
Overview
This page lists the steps required to set up the USIMS Student Backpack, ensuring connection to state endpoints and manage student data.
Setting Up the Ed-Fi Profile
-
Navigate to System Management > Server > Plugin Configuration.
-
Search for PowerSchool Data Exchange (DEX) and ensure the Data Exchange plugin is enabled.
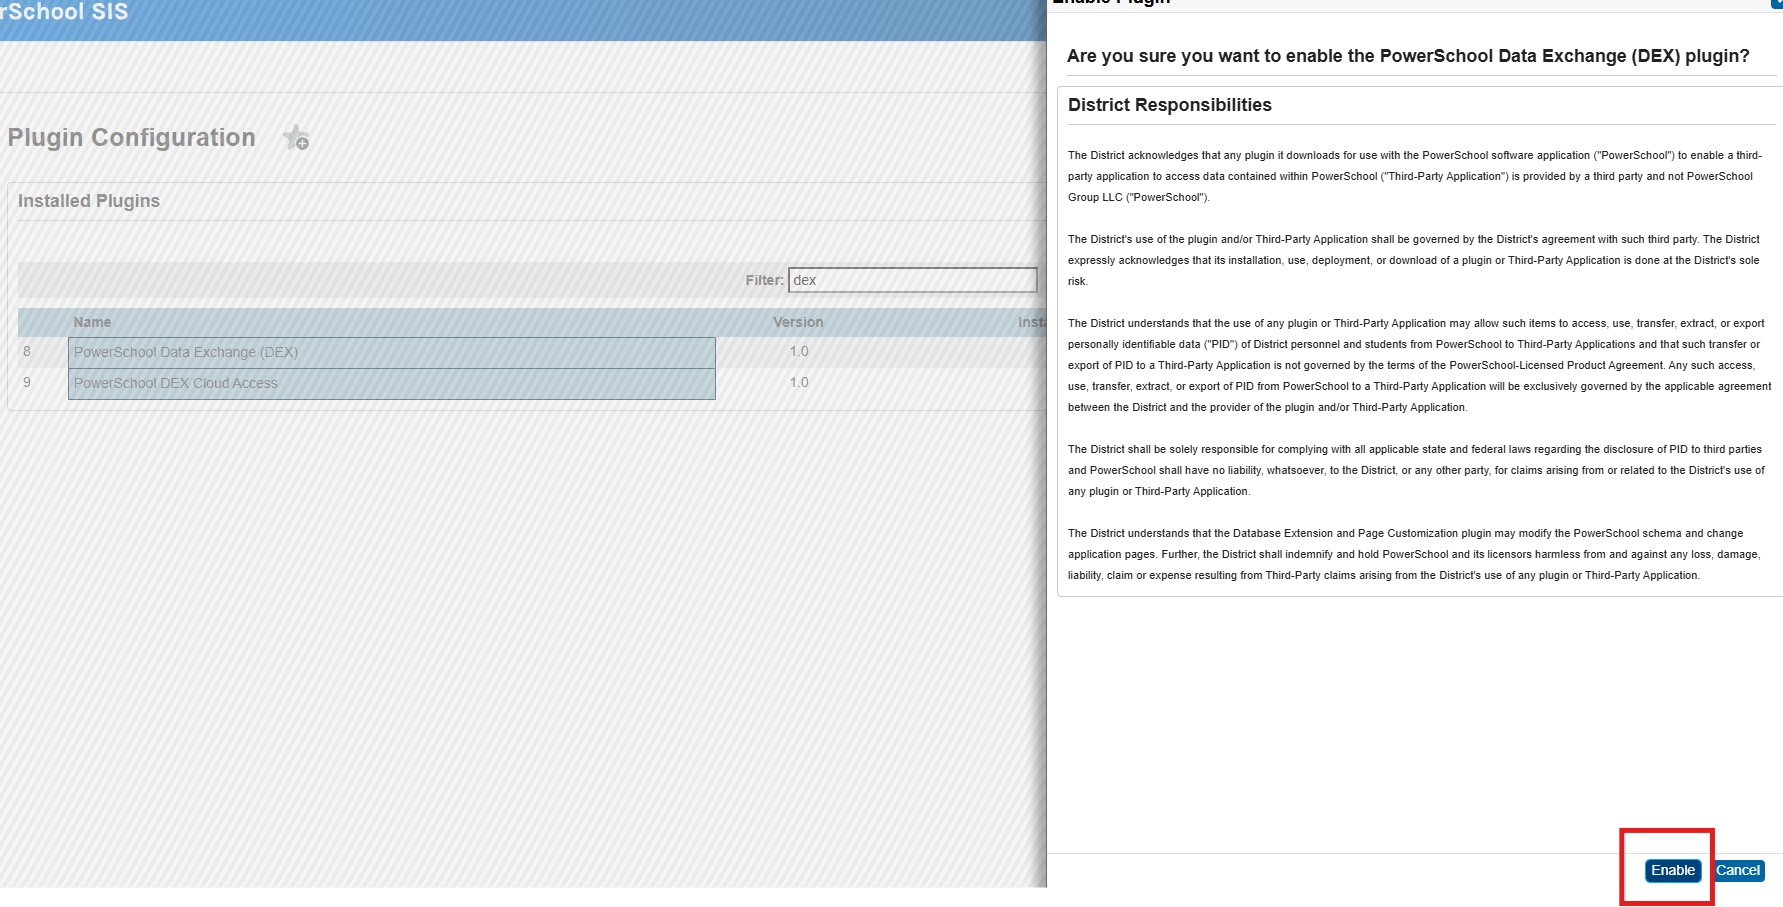
-
Click on the PowerSchool Data Exchange (DEX) again.
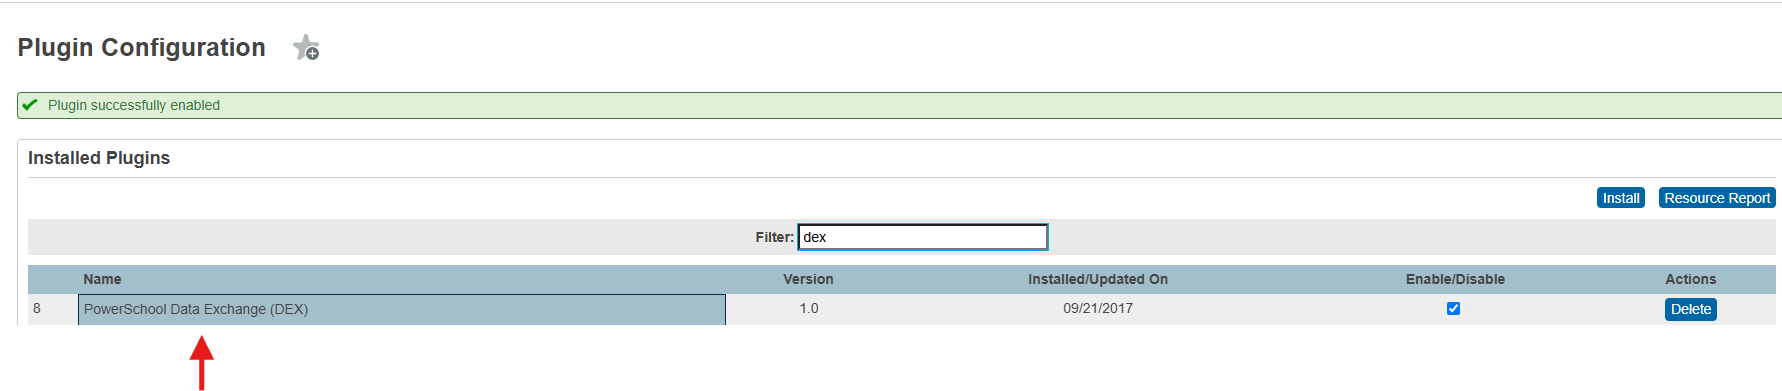
-
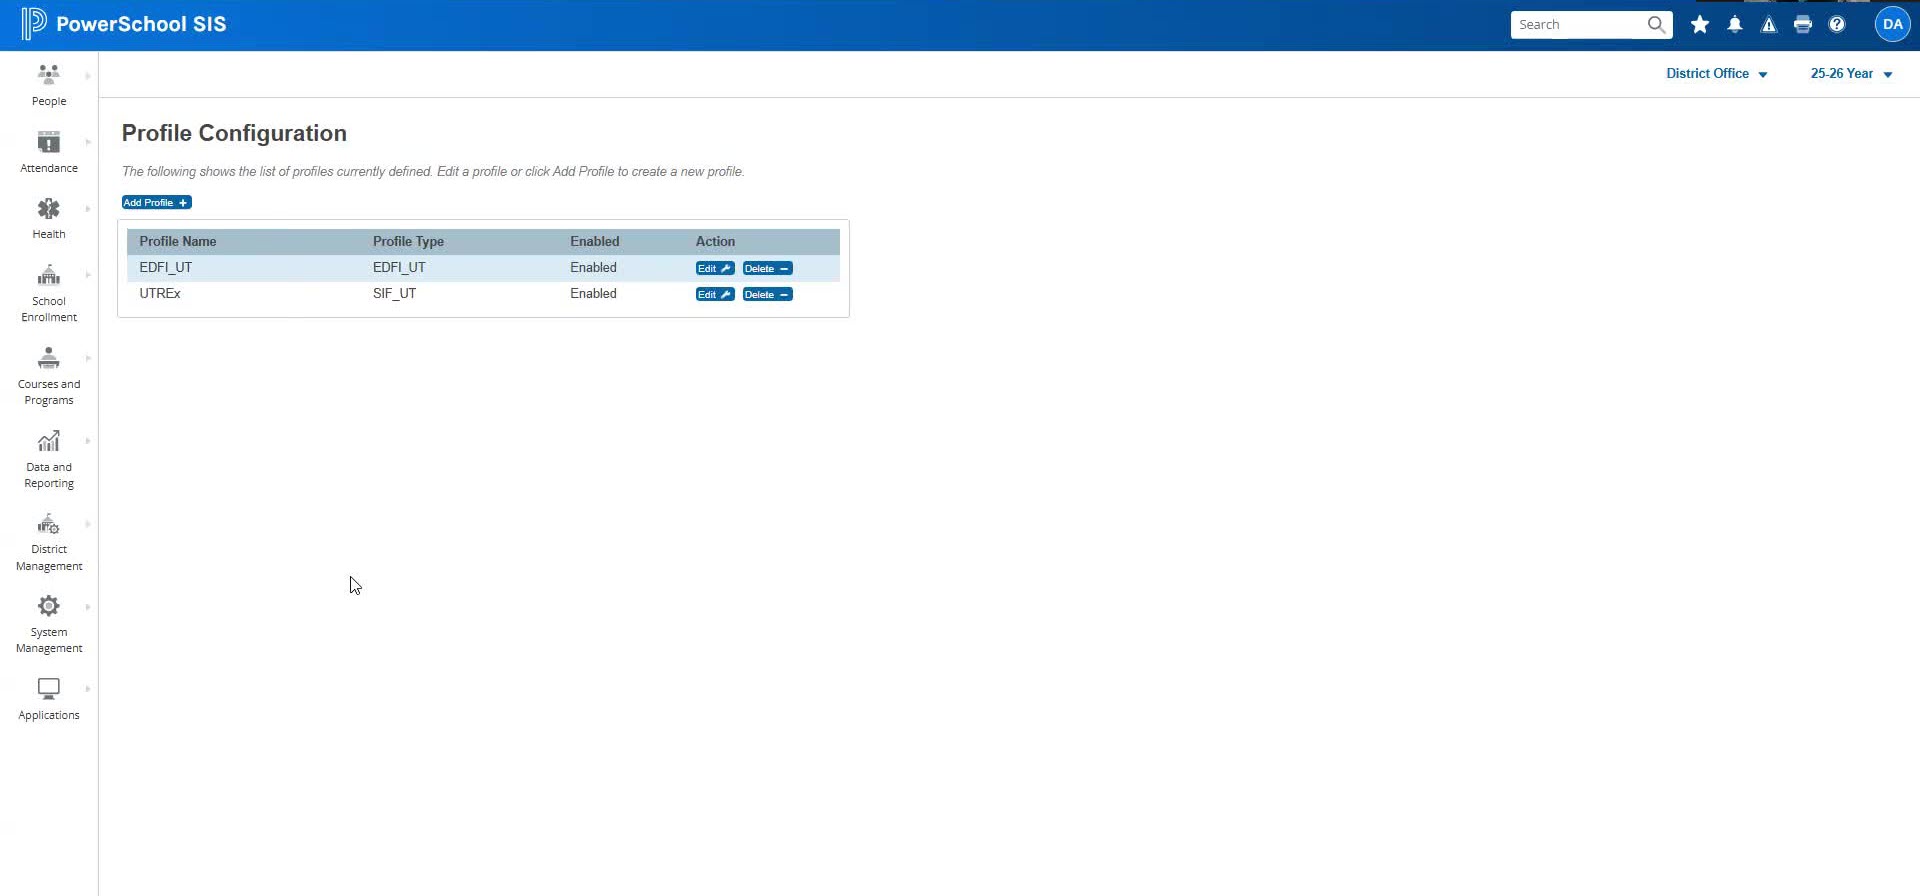
Go to Profile Configuration and check for an existing profile with type
EDFI_UT.-
If it exists and is enabled, no further action is needed.
-
If not, click Add Profile, name it
EDFI_UT, set the Profile Type toEDFI_UT, enable it, and save. You can use any other profile name as well. What matters here is the Profile Type.
-
Data Exchange Setup
-
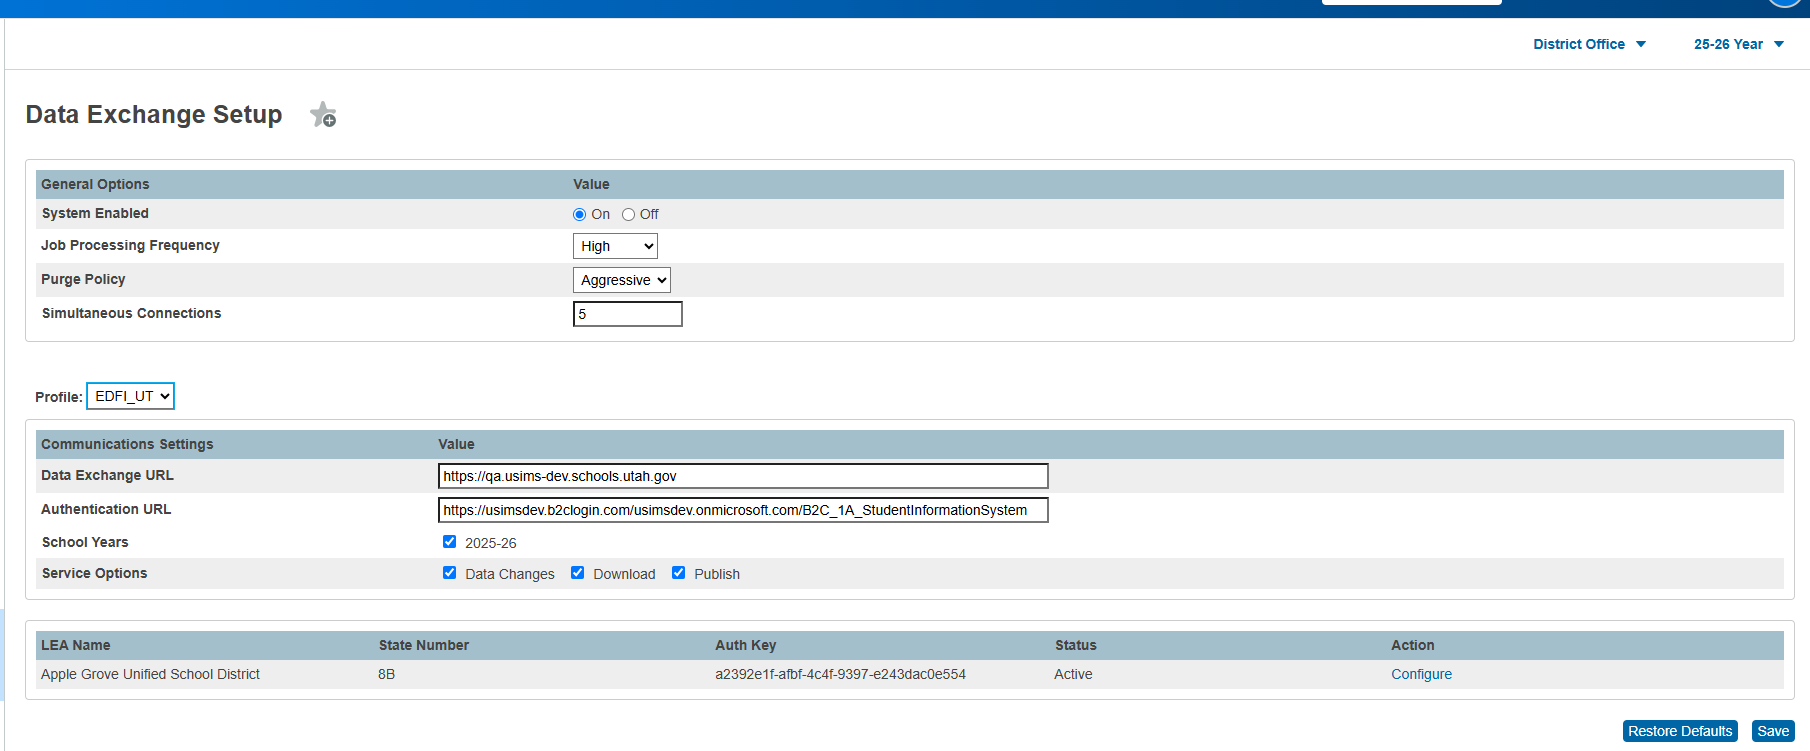
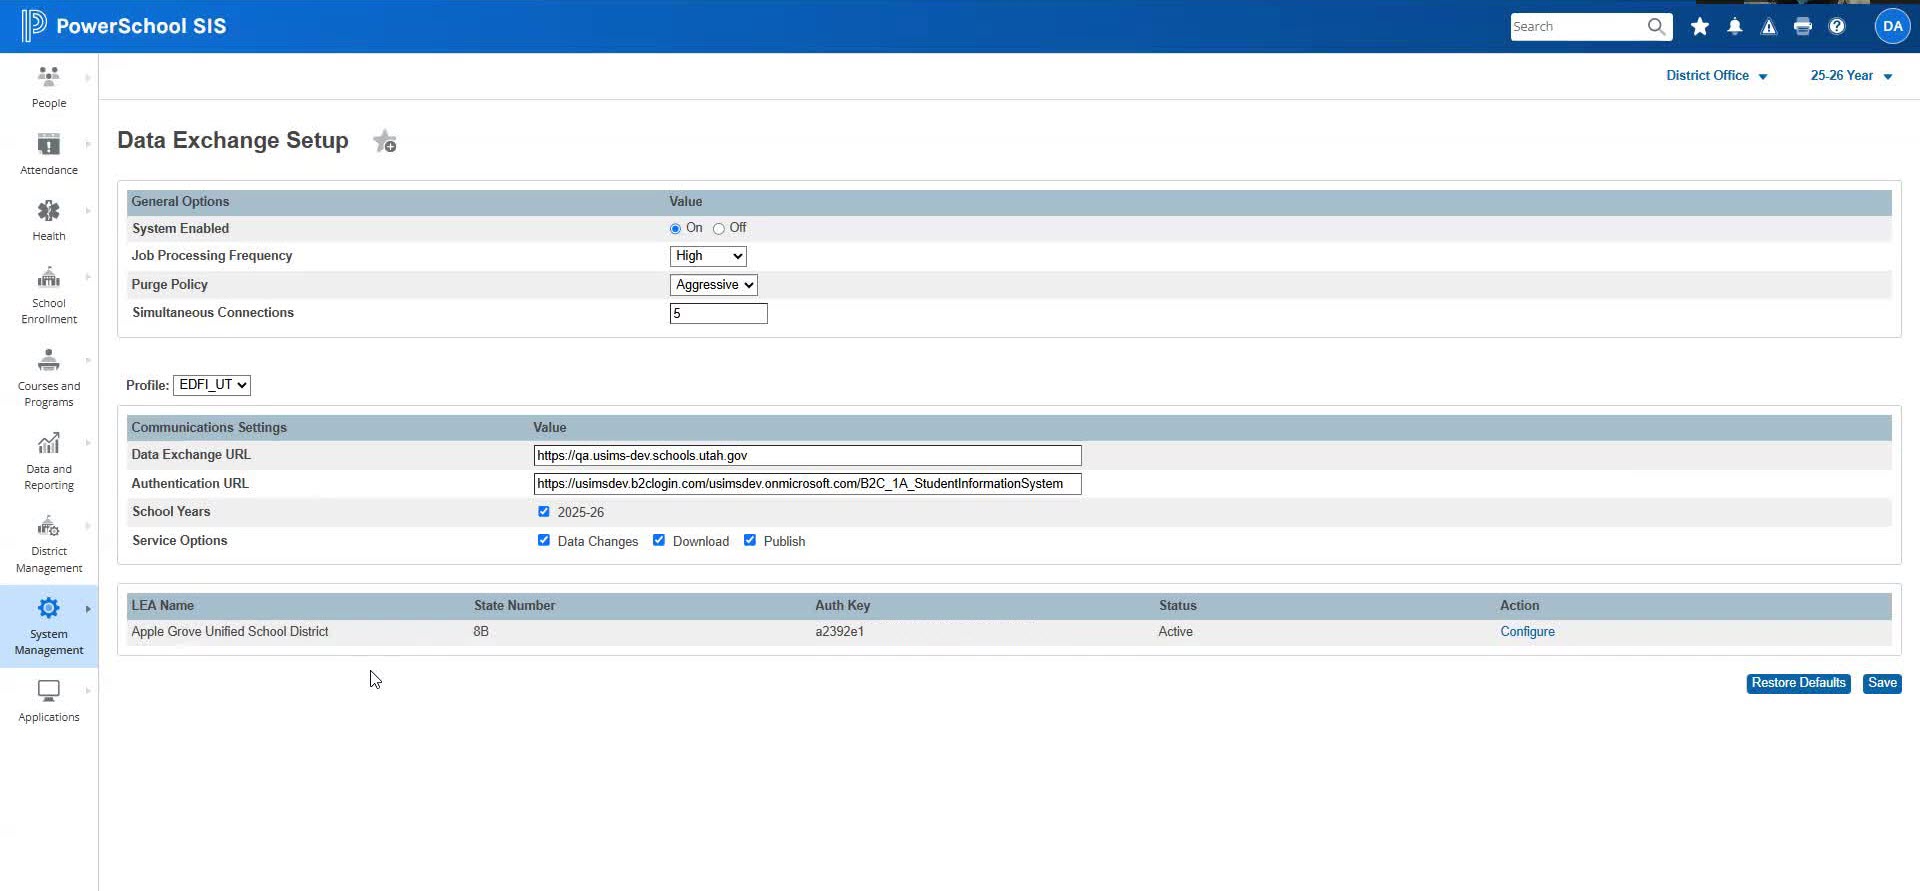
Go to System Management > Data Exchange > General Setup. Verify the newly created profile(EDFI_UT) appears in the list and select it. Note: You will have to be at District Office level to do this step.
-
Update the communication settings:
-
Data Exchange URL: https://usims.schools.utah.gov (provided by USIMS)
-
Authentication URL: https://usimsprod.b2clogin.com/usimsprod.onmicrosoft.com/B2C_1A_StudentInformationSystem (provided by USIMS)
-
School Year: Set to
25-26. As new years are enabled each year, the corresponding checkboxes should be checked. -
Check all service options.
-
Click Save to ensure all the details are saved before proceeding.
-
Adding Authorization Key and Secret
-
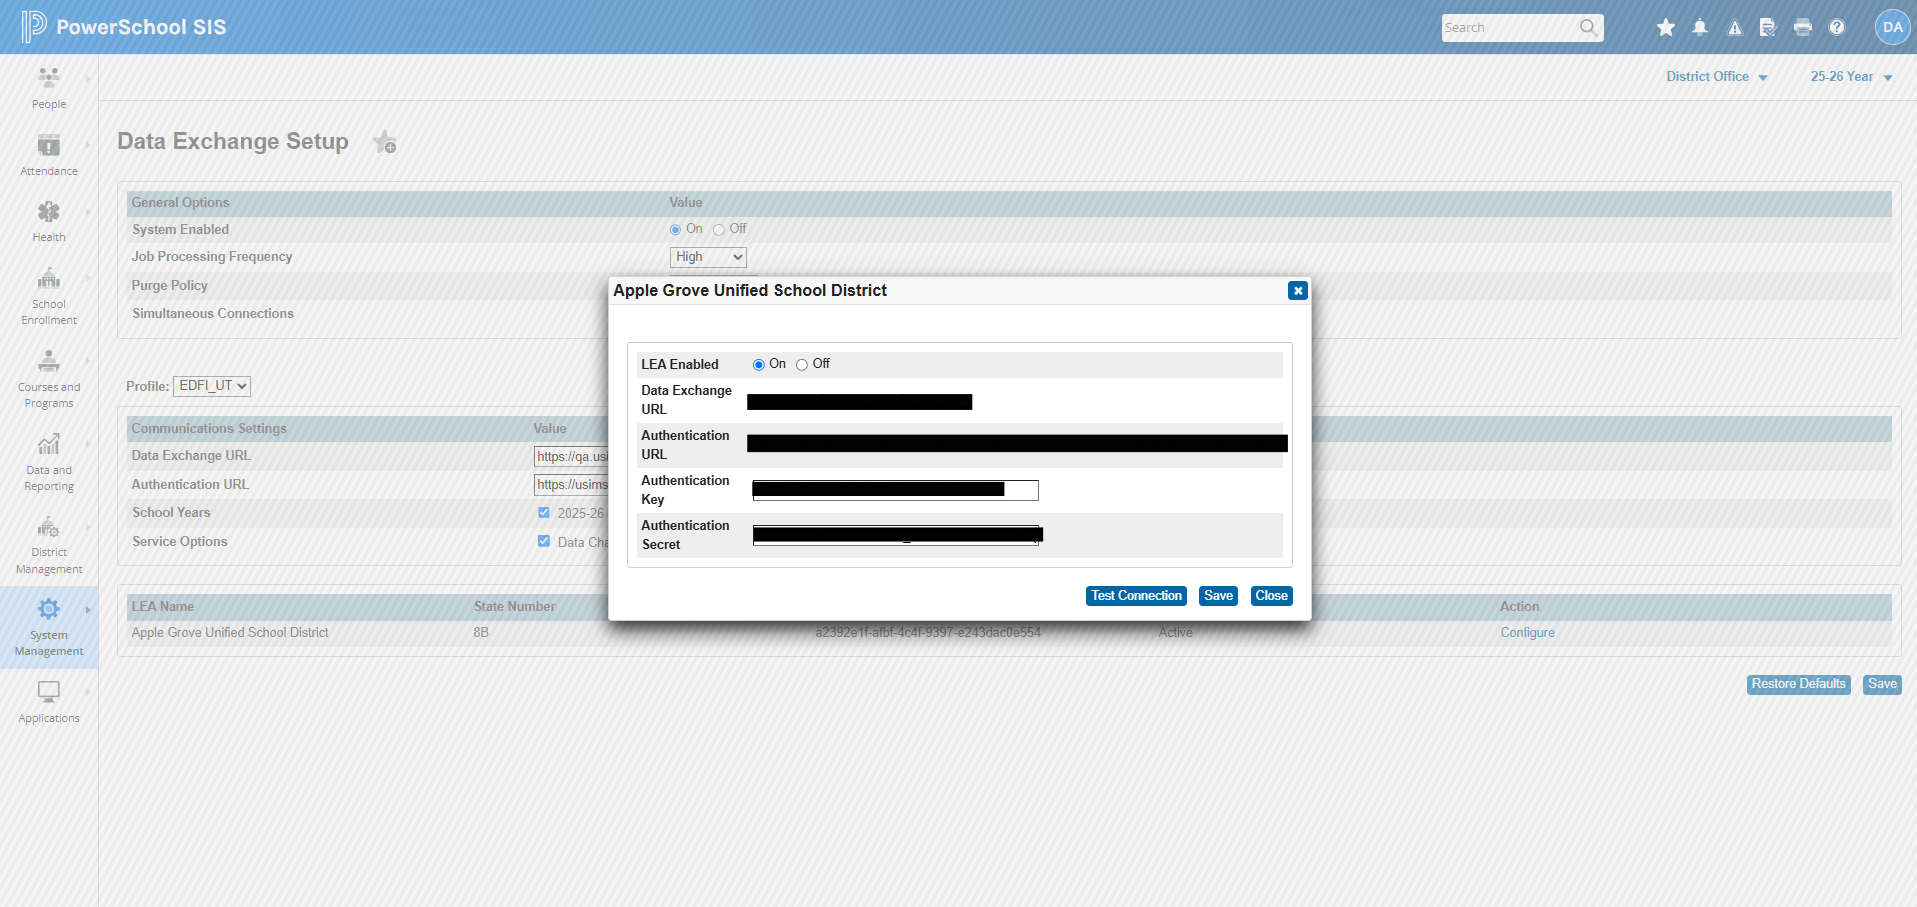
Click Configure under Action.
-
Ensure LEA is enabled and the URLs are correctly displayed. The State Number for the LEA is fetched from the District Info page in PowerSchool. The value is required for the connection to be successful.
-
Enter the authentication key and secret (generated in the LEA Client Manager). Please reach out to the USIMS team for getting setup in the USIMS LEA Client Manager and generating the key and secret for your LEA.
-
Test the connection to ensure it is successful.
-
Save the connection details.
-
Ensure all URLs and keys are entered correctly to avoid connection issues.
-
Check for leading or trailing spaces when copying keys and secrets.
Downloading School Information
-
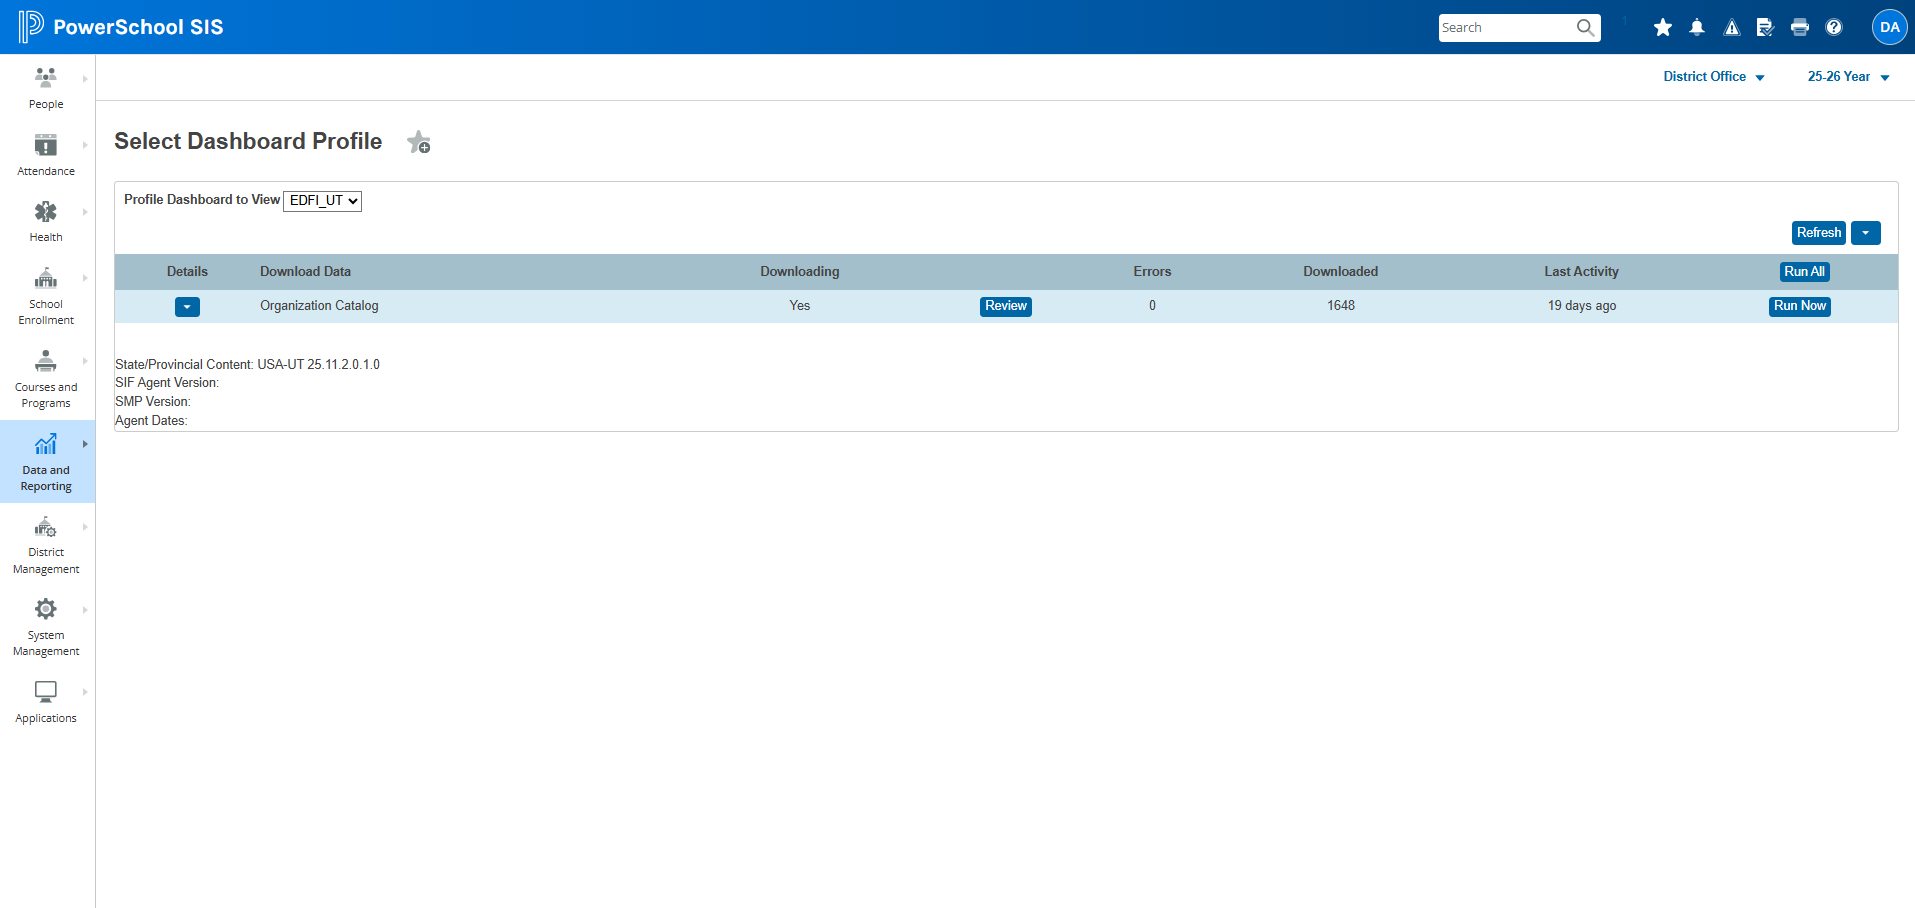
Navigate to Data and Reporting > Data Exchange at the district level.
-
Ensure the profile is set to
EDFI_UTand select the school year. -
Click Run Now to download the current list of all district schools.
-
Note: The download is year specific. Make sure to select the current school year before downloading.
Setting Permissions
-
Go to Staff > Current User > Staff Profile > Demographics.
-
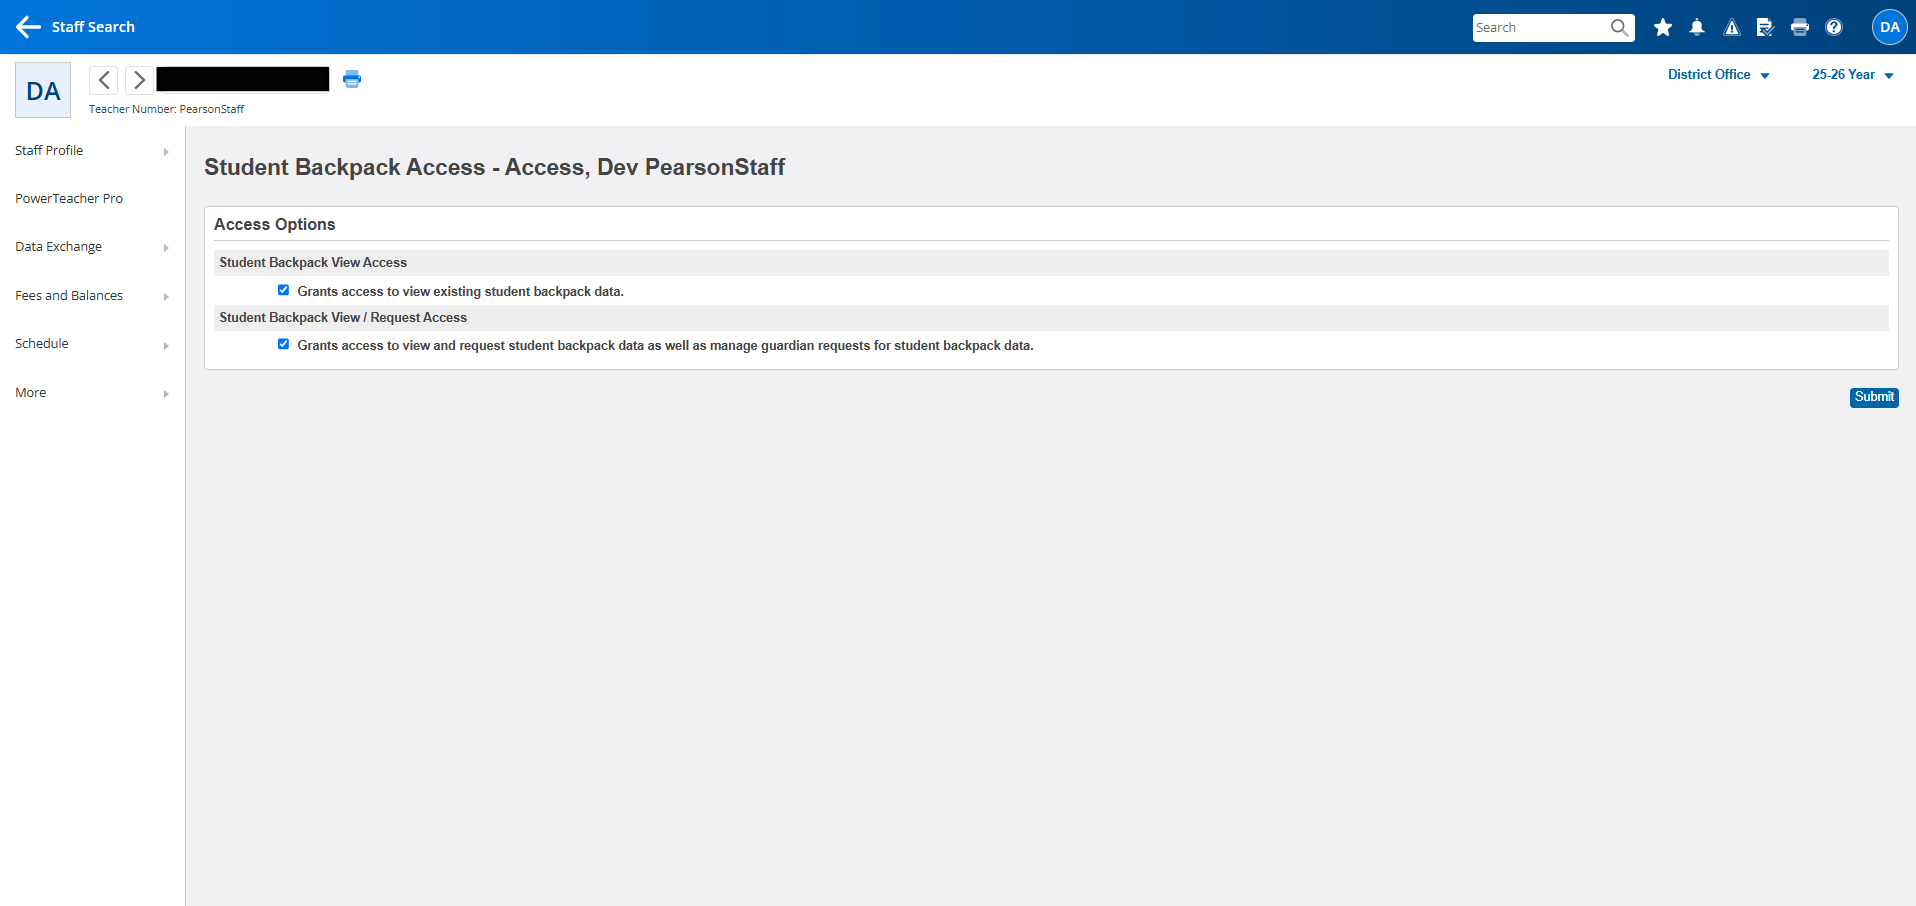
Under State and Report Information, click on Student Backpack Access.
-
Set permissions:
-
View Access: Check the first box.
-
View and Request Access: Check both boxes.
-
Requesting Student Backpack Data
-
Ensure the state student number is populated in Compliance > State Info.
-
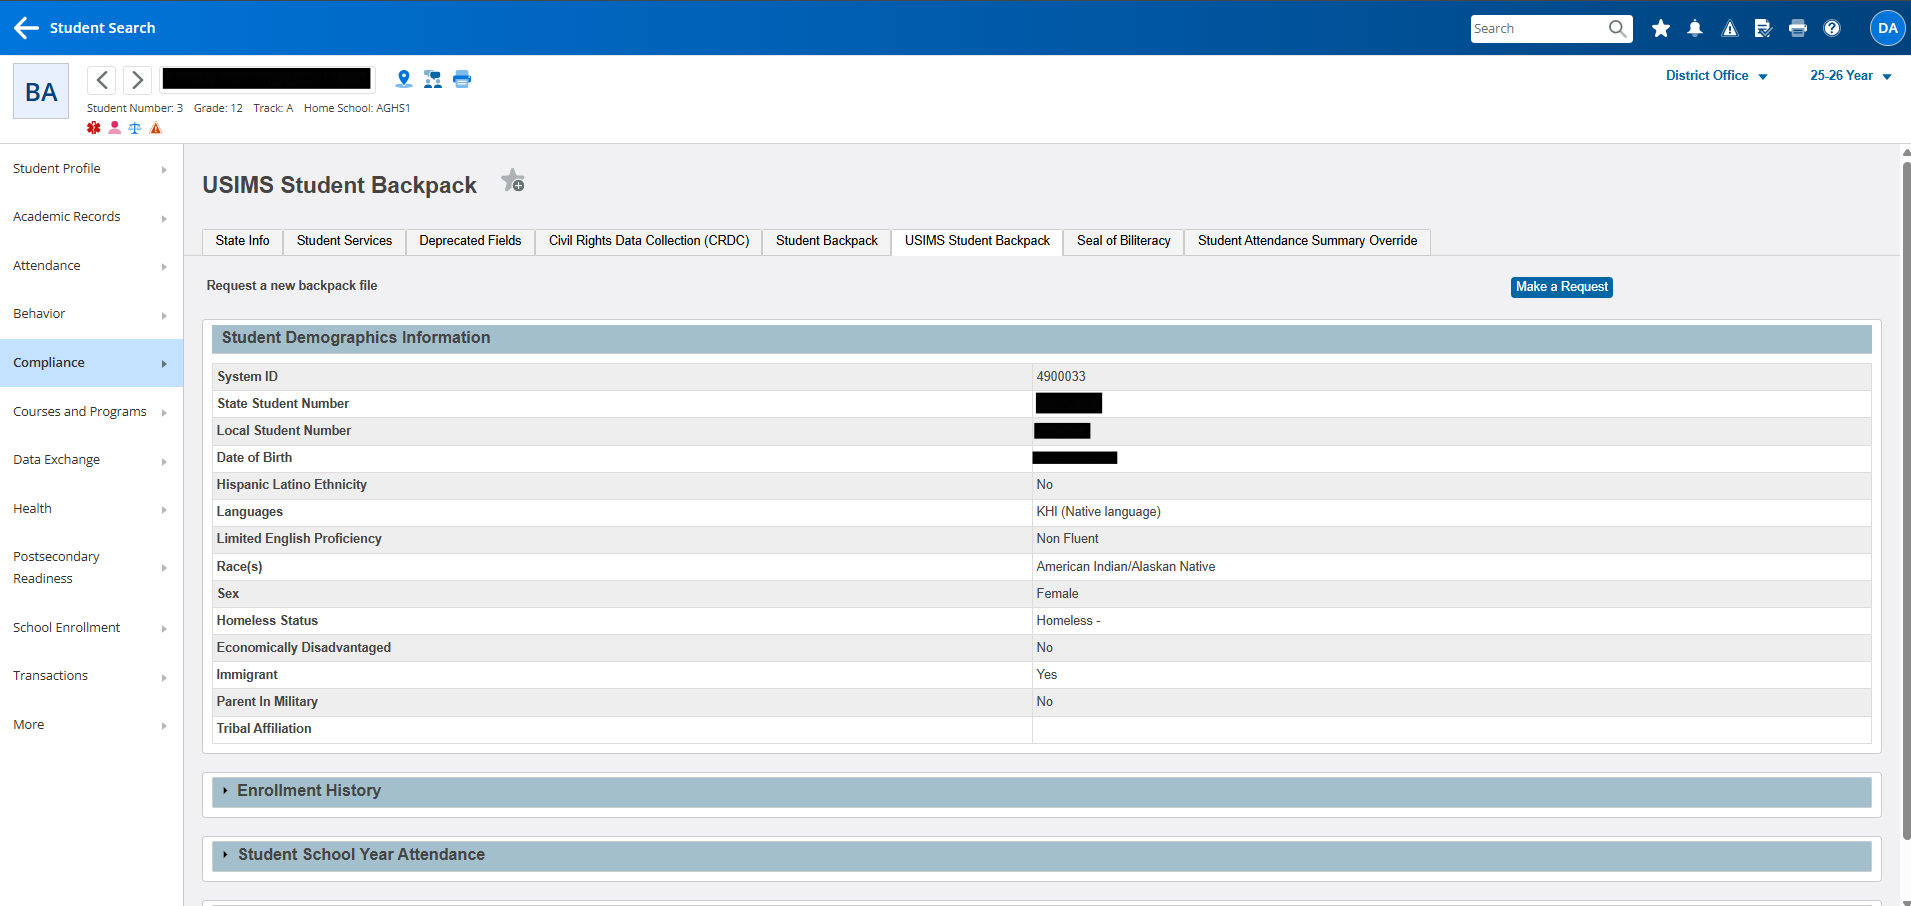
Navigate to Compliance > USIMS Student Backpack.
-
Click Make a Request to fetch the data.
-
If the state student ID is incorrect or missing, appropriate error messages will display.
-
Ensure to check for authentication issues if data is not fetched.