Bulk Update Census Block Data
This page provides a step-by-step guide for the PowerSchool feature to Bulk Update Census Block Data. The feature automates the process of fetching Census Block Data from the Census Geocode API based on the student’s Home Address. It updates the values of State Code, County Code, Tract Code, and Block Code on the CO Demographics Page.
Step 1: Navigate to the Bulk Update Census Block Data page in the PowerSchool SIS
Path: District Management > District Setup > District Info > Colorado State Specific Information > Bulk Update Census Block Data

Step 2: Select one of the 2 modes available
Process all students
Runs the process for all students irrespective of their Census Block Data Retrieval Status**.
This will overwrite all existing values.
Process only unprocessed/new students
Runs the process for students whose Census Block Data Retrieval Status** is blank or No Match.
The process will not run if the Census Block Retrieval Status is Success.
If you have updated the data manually for students, please ensure that the Census Block Retrieval Status is marked as Success to prevent an overwrite
**Census Block Data Retrieval Status is available in the S_CO_STU_X table as CENSUS_STATUS. In the UI, it is available in the CO Demographics page of a student in the Census Block Data section.
Path: Select Student > Compliance > CO Demographics > Census Block Data > Census Block Data Retrieval Status (dropdown)
Dropdown Value | Value stored in the Database | Interpretation |
|---|---|---|
blank | blank | Census Block Data update through Geocode API has not been initiated for the student |
No Match | 0 | Census Block Data not returned for the students from the Census Geocode API |
Success | 1 | Census Block Data updated in PowerSchool successfully based on the values returned by the Census Geocode API |
Step 3: Submit the Process
After submitting the process, we recommend that the browser tab be kept open until the process completes and you see either a success or failure message. Users may continue to use PowerSchool in other tabs/windows.
Even if users close the tab where the Bulk Update process is running, the process will still continue to run in the background. Just that users (for now) will not be able to know the status of the process without running the At-Risk Interchange Report in the Status Report Mode.

Step 4: Bulk Update Process Completion - Success
After the process completes successfully, users will see the following success message.

If the Census Block Data update for a student fails due to some issues in the Census Geocode API call, users will see the following message.
There was an issue in the Bulk Update of Census Block Data. Please contact the administrator.
If the process has successfully run, users will be able to see the updated values for students in the CO Demographics Page. The Census Block Data Retrieval Status will be updated to “Success”.

Step 5: Generating the At-Risk Interchange Report
After the Bulk Update Census Block Data process has been run, users can run the At-Risk Interchange Report.
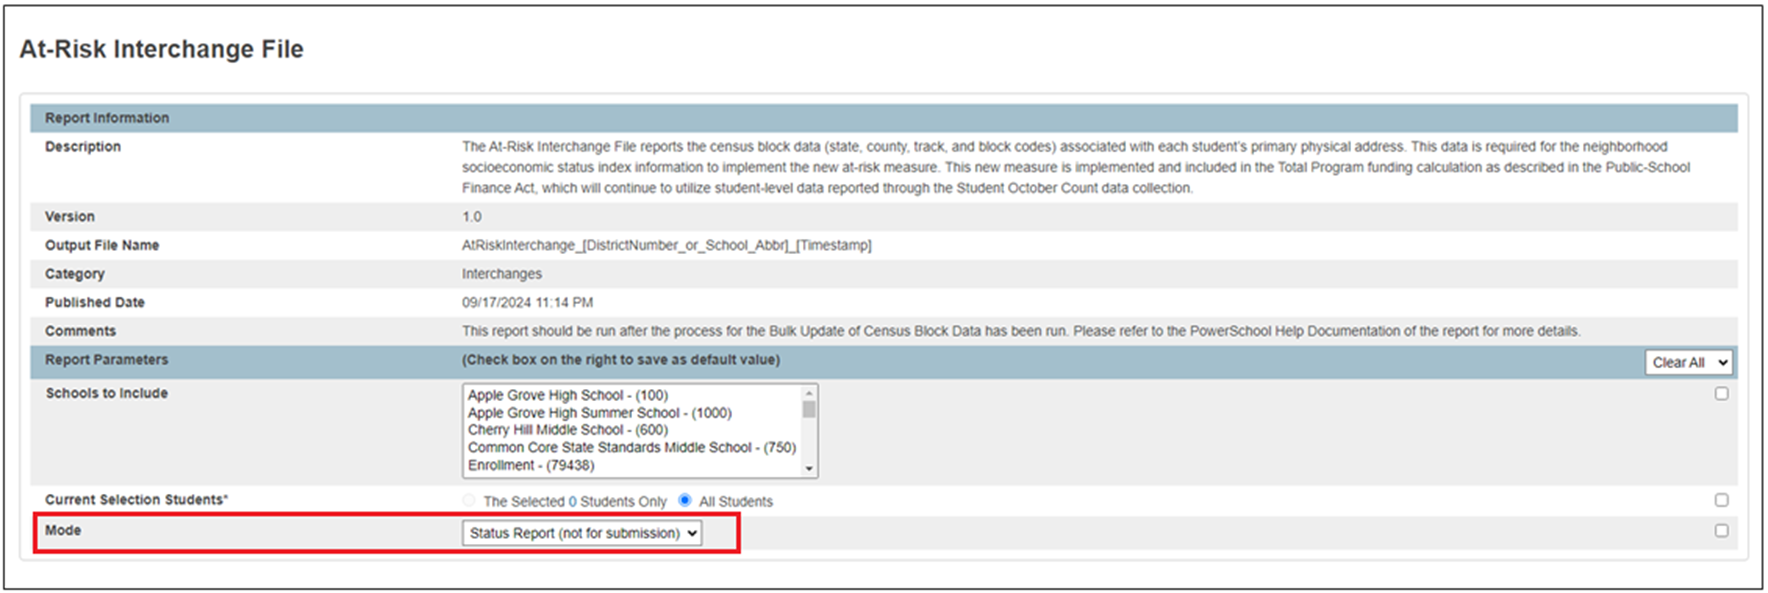
Path: Data and Reporting > Reports > Compliance Reports > At-Risk Interchange File
The report can be run for one or more schools or the entire district (if no school is selected). Users can also run it for a specific set of students based on their student selection on the Start Page.
The At-Risk Interchange Report supports 2 modes - the State Submission mode and the Status Report mode.
Status Report Mode (not for submission)
The Status Report mode enables users to generate the At-Risk Interchange Report with a CENSUS_STATUS field in addition to the fields required by the CDE. The value in this field corresponds to the Census Block Data Retrieval Status field on the CO Demographics Page and to the CENSUS_STATUS field in S_CO_STU_X table in the database.

Sample Output

The following are the reported values of CENSUS_STATUS field along with the interpretation.
Reported value of CENSUS_STATUS | Interpretation |
|---|---|
blank | Census Block Data update through Geocode API has not been initiated for the student |
0 | Census Block Data not returned for the students from the Census Geocode API |
1 | Census Block Data updated in PowerSchool successfully based on the values returned by the Census Geocode API |
Note: For students whose CENSUS_STATUS = 0, users will need to update/modify the address so that the Census Geocode API returns the Census Block Data. Once the updates are done, users can re-run the Bulk Update Census Block Data process and select Run for unprocessed/new students.
State Submission Mode
When the Census Block Data has been updated, users can run the At-Risk Interchange Report in State Submission Mode.

Sample Output:

What if we want to prevent overwrite for Students whose Census Block Data has been manually updated?
To prevent the overwrite of manually updated Census Block Data, users can update the Census Block Retrieval Status field in PowerSchool as “Success”.
Please follow the below steps to do it in bulk using the PowerSchool Data Import process.
For assistance with the below steps, please reach out to PowerSchool support.
Path: Data and Reporting > Imports > Data Import Manager
Step 1: Identify Student DCIDs using Student Number or Name
DCIDs can be found on the Students table using the STUDENT_NUMBER, STATE_STUDENTNUMBER or LASTFIRST (if name is being used). PowerSchool Data Export Manager can be used for this.
Step 2: Create a csv file for the import
Header row – dcid,census_status.
Add the list of dcids and census_status as 1 for all. Please do not use any spaces in the file. Choose the file as the import source.
Sample:

Step 3: Choose the following Source and Target values and click Next

Step 4: Choose the following Mapping and click Next

Step 5: Choose the following Options and click Import

