Synchronization
The Synchronize command launches a wizard that updates the PowerSchool database records with data from SIF Data Objects published by other applications. The wizard prompts you in the steps required for importing data to selected zone(s).
Note
To be included in the data import/synchronization process, SIF Data Objects (Student Meal, StudentPersonal, and/or StudentTransportInfo) must be enabled as Write Back items; for information about enabling objects for Write Back, see "Write Backs" in the Agent Settings section of this document.
To synchronize the PowerSchool database records with data from SIF Data Objects published by other applications:
- Start the PowerSchool SIF Agent and the console.
- From the main menu of the console, select Tools > Synchronize.
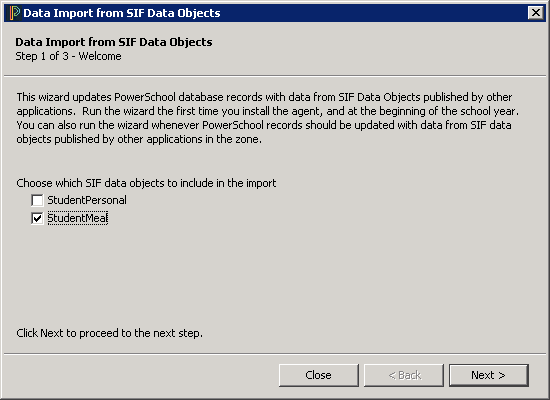
- A Welcome screen (Step 1 of the synchronization) displays a description of the data import, and lists SIF Data Objects from which you can choose to import data. (Only objects previously enabled as Write Back items will be displayed on this screen.)

- Select the SIF data objects to include in the import.
- Click Next.
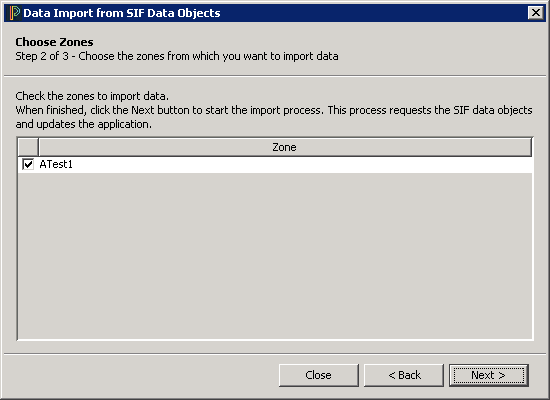
- The Choose Zones screen (Step 2 of the synchronization) displays a list of zones from which you can import data.

- Select the zones from which you wish to import data.
- Click Next to start the synchronization.
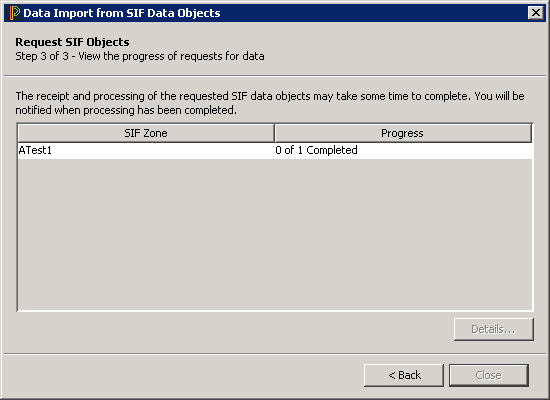
- The Request SIF Objects screen (step 3 of the synchronization) displays the progress of the data import.

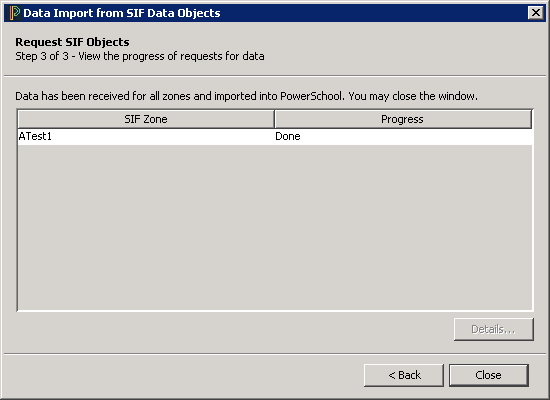
- When the data import is complete, you will see confirmation in the Progress column of the Request SIF Objects screen:

